OhoraSemi Cured Gel Nail Strips N Mini Christmas
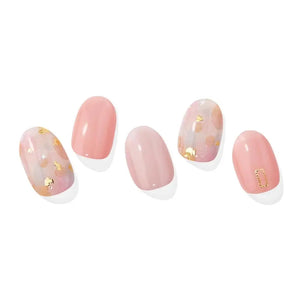
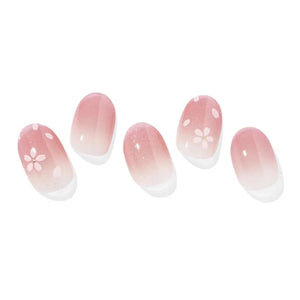
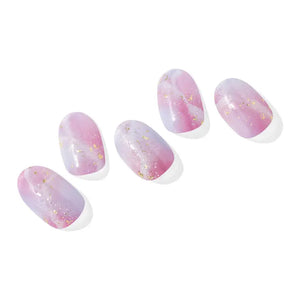
The Ohora Semi Cured Gel Nail Strips N Mini Christmas are gel polish stickers with Christmas figures that give your nails a festive look.
Description
The Ohora Semi Cured Gel Nail Strips N Mini Christmas are the must-have for a festive look during the Christmas season! With these semi-cured gel polish stickers, you can effortlessly create beautiful, long-lasting nails.
The gel polish strips are already semi-cured, making them super easy to apply to your nails. Thanks to their curved shape, they fit perfectly on your nail bed. After curing under an LED lamp, you'll enjoy salon-worthy gel nails that stay beautiful for a long time. Want to know more about Nail Wraps? Check out our handy blog!
These gel nail wraps:
- for a festive Christmas look
- easy to apply
- semi-cured gel polish stickers
- stay beautiful for a long time
- fit perfectly on your nail bed
- must be cured under an LED lamp
- contain 30 nail stickers in 15 sizes
- include prep pads, nail file, and wooden stick
How to use
-
Step 1, Prepare your nails:
Start by thoroughly washing your hands to remove oils and moisture, as these can reduce the adhesion of the gel nail strips. Remove old nail polish and gently push back your cuticles. You can also lightly file your nails for a smooth base. Use the included prep pad to clean your nails and ensure they are completely dry. Optional: use Ohora Pro Nail Primer Plus for a smoother base and better adhesion of the strips. -
Step 2, Apply the nail strips:
Choose a gel nail strip that matches the width of your nail and carefully peel it off the transparent film. Make sure the side with markings points towards your cuticle. Place the strip on your nail, leaving a small space near the cuticle. Press firmly from the center and work towards the edges to smooth the strip. Optional: use the rubber end of the Ohora Pro Easy Dual Stick for a perfectly smooth application. -
Step 3, Trim and shape:
Use the included nail file to file away excess strip, working in a downward direction to prevent damage. For a neat finish, you can use the wooden stick to smooth the edges. -
Step 4, Cure the gel nail strips:
Place your nails under the Ohora UV/LED lamp to cure the strips. Check that the strips are fully cured; they are ready when the gel is hard and shiny. -
Step 5, Apply Ohora Pro Glossy Top Gel (optional):
After curing, apply a top coat for extra shine and protection. Cure this top coat under the UV/LED lamp; this formula is non-sticky and does not need to be wiped off. -
Step 6, Final touch-up:
Once the strips are completely dry, you can apply cuticle oil or moisturizer to hydrate your cuticles and keep your nails looking healthy. -
Removal: Ohora gel nail strips are easy to remove with the Ohora Pro Easy Peel Remover. Apply a few drops to the strip, use the Ohora Pro Easy Dual Stick to gently lift the edge of the strip and further loosen it. Don't have Ohora remover? Then use an acetone solution by placing cotton pads on your nails, wrapping them in aluminum foil, and after 10-15 minutes, gently remove the softened gel.
Ingredients
Content: 30 nail strips in 15 different sizes, 2 prep pads, 1 nail file, 1 manicure stick.